Die for food, crazy for cats. Depress at night alone.
Die for food, crazy for cats. Depress at night alone.
After understanding how to create a comic frame in Medibang, let's go to the next part to customize and delete the comic frame.
1. Adjust the thickness of the comic panel border
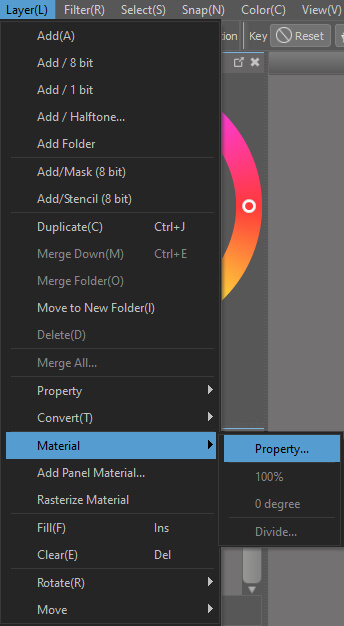
If you think the outline you made for your comic panel at the start is too thick or too thin, you can completely replace it by going to Layer -> Material -> Property after you've made it.
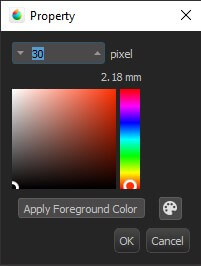
With the Property window, you can change the thickness of the outline at any time by changing the number in the box.
You can also use the Operation tool ![]() in the toolbar to modify outline thickness. When you use the Operation tool and click on a comic panel, there will be a gear button appear.
in the toolbar to modify outline thickness. When you use the Operation tool and click on a comic panel, there will be a gear button appear.
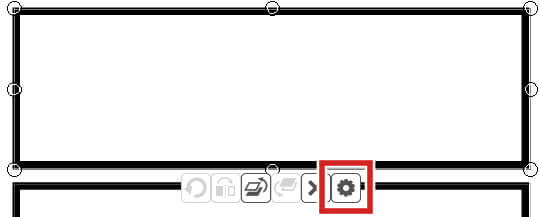
Clicking on that button will also open the Property window, where you can change the thickness of your comic panel outline.
2. Change the color of the comic panel
With the Property window, you can completely change the color of your comic panel to your liking in the following 3 ways:
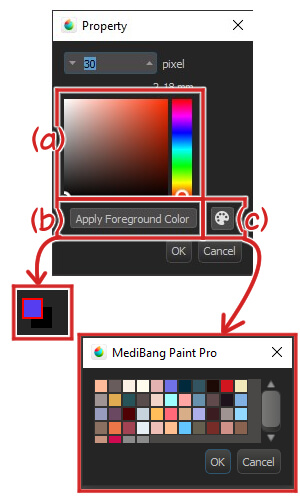
a. You can pick the color right from the box that shows up in the window.
b. Click Apply Foreground Color to immediately use the Foreground color from the Color window to your comic panel.
c. You can also click on the palette button to bring up a Palette window where you can choose a color you've saved before.
Click OK once you've chosen the color, and the color of your comic panel has changed!
3. Change the comic panel shape in Medibang
You can change the shape of a comic panel in any way you want with the Operation tool. To change how they look, click on the comic panel you want to change and the circles around it will show up. Then click, hold, and drag with your mouse to change the shape of the panel until you're happy with it.
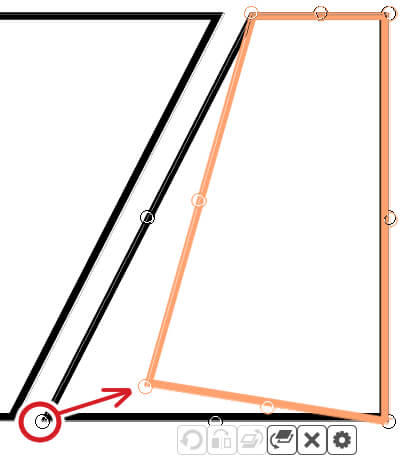
But you can only change to a different shape for panels that are cut diagonally. When a panel is cut horizontally or vertically, the length of that one can change, but it will always be squares or rectangles.
4. Change the position of your panel
To move your panel to another position, you can use the Operation tool to hold and drag the comic panel to the area you want to.
If some of your comic frames overlap, you might want to switch them such that A is on top of B instead of the other way around. This isn't very important for frames that are the same color. But if the color borders are different, the Operation tool is the tool you need to use. After you click on one of the two frames you need to change, the position switch button will show up in the menu below.
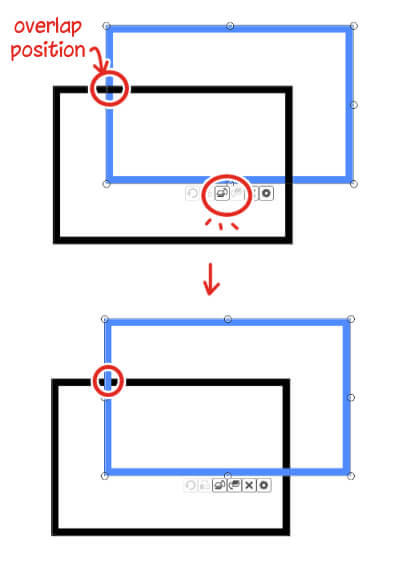
Now, just press the button until the frame of the comic moves to where you want it to be.
1. Delete a comic panel in Medibang
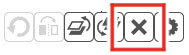
When you use the Operation tool and click on a comic panel, an X button will show up next to the gear. Just click on that X, and your comic panel will be gone.
2. Delete a part of your comic panel:
If all you want to do is get rid of some parts of the panel, there are 3 ways to do it:
a. Rasterized
When you are happy with how all of your comic panels are placed, the last step is to get rid of some lines you don't want. To do this, just go to Layer -> Rasterized Material.
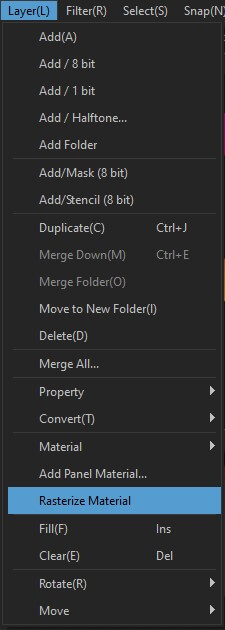
Why do you have to do that? Your comic panel is an object, so the @ symbol will be on its layer.
This means that you can't erase them with simple tools like Eraser. To turn your comic panel layer into a regular layer, you have to use the Rasterized method. Then we can erase whenever we want with erasers.
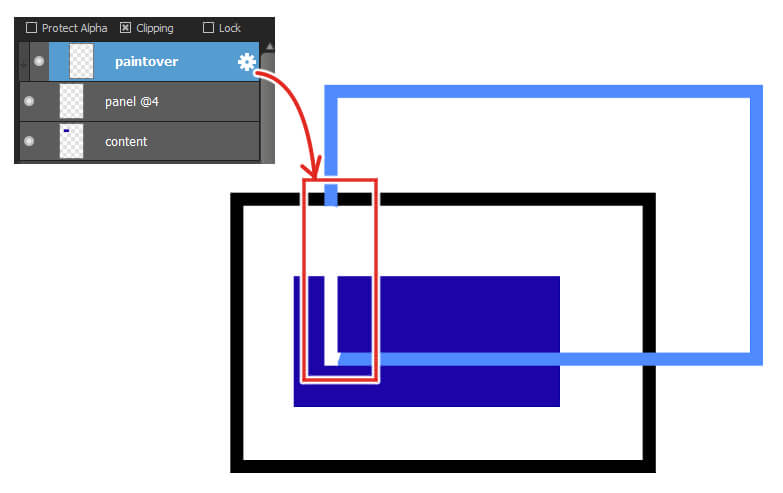
b. Paint over the outline.
Make a new layer right above the one containing your comic panel, then paint it with the same color as the background. With this, your comic panel will be covered and look like it's disappeared. if you choose this option, you don't have to rasterize the comic panel layer, and they can be modified later.
But this will be a problem because your extra stroke will smear and look hideous. We can fix it by using Clipping to make this paint-over layer only work inside the borders of the comic panel. Read the article about Layers if you still don't understand how clipping and layers work.
The real issue is that it will be obvious if the paint over layer color doesn't match the background color. Because we didn't truly remove the comic panel; we simply painted over it.
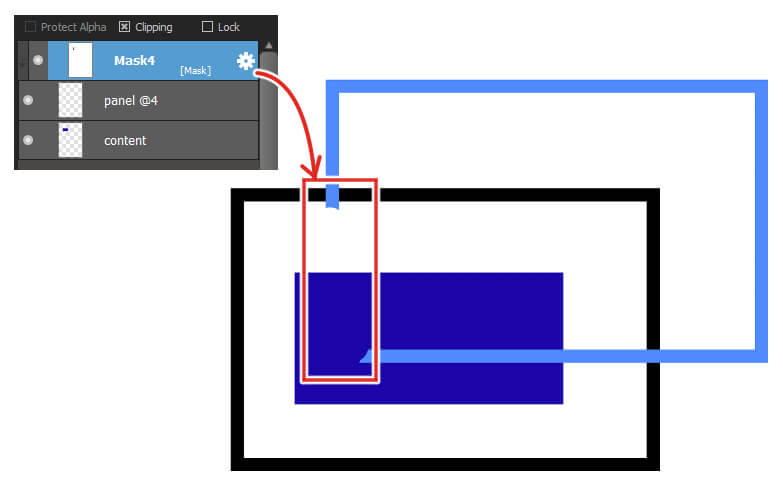
c. Masks for layers.
Layer Mask is the most complete solution. With Layer Mask, you won't have to Rasterize the panel layer, so you can change your comic panel position whenever you want. And unlike when you use the Clipping layer, you don't have to worry about revealing color because the layer mask covers it perfectly, making it look like you really erased it.
You can read the article about Layer Mask to learn more about what makes it so magical.
And now you can use the framing tool in Medibang Paint Pro like a pro. In the next article, I'll talk about Medibang's Palette window.
