Die for food, crazy for cats. Depress at night alone.
Die for food, crazy for cats. Depress at night alone.
Layer, in my perspective, should come before the Brush tool. Layers are one of the most crucial techniques to master in digital graphics. It will assist you in reducing your working time and creating digital effects that will enhance the beauty of your artwork.
You can also watch the basic about Medibang Layer in this video:
I. What is a Layer?
A layer is a sheet of magic transparent paper. You can create a lot of those paper sheets in just one file. Then you can make those papers disappear, move them to the top/under of another one, or just put them in the trash with a simple click.
This image is a great example to help you understand the layer's logic in a digital art program. You can see an image on your computer look like this:

But in your art program, it will be like this:
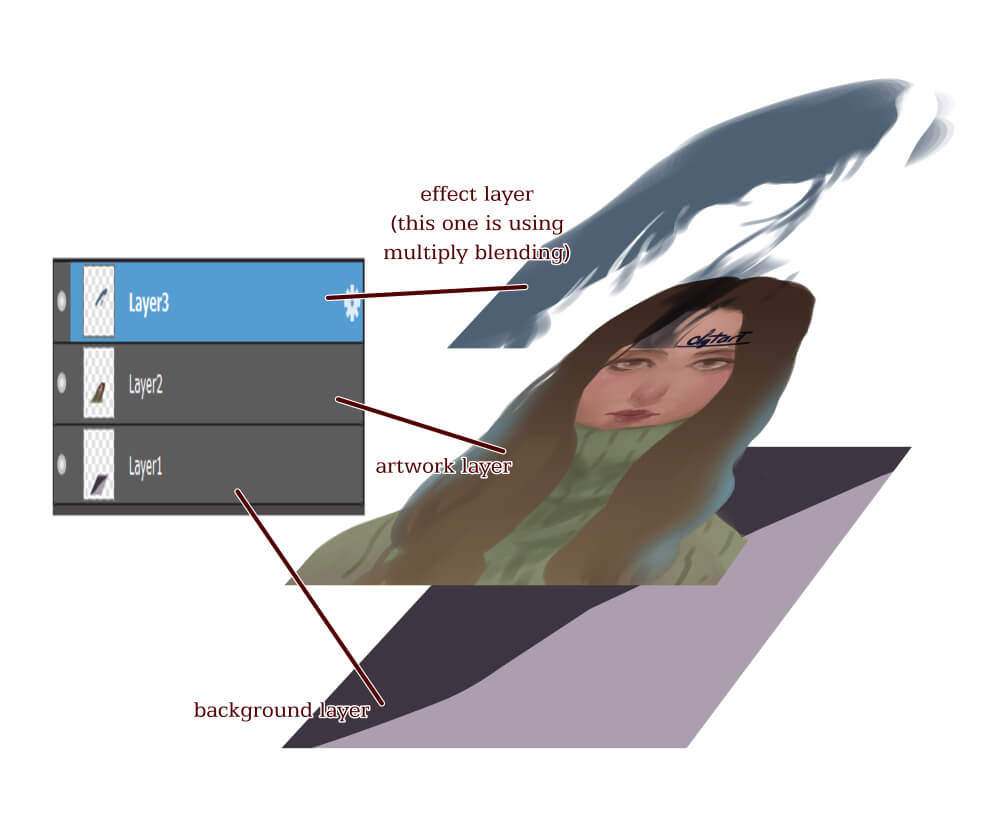
With these magic paper sheets, you can erase the effect or background layers to achieve a different result without affecting your fantastic artwork.
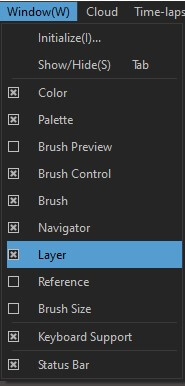
II. Layers Box in Medibang
When you open Medibang Paint Pro or another digital art program, the layer window will often stay at the bottom right of your screen.
In case you can't find it anywhere, you can open this layer window with menu Window -> Layer
Now, let me explain this Layer window.
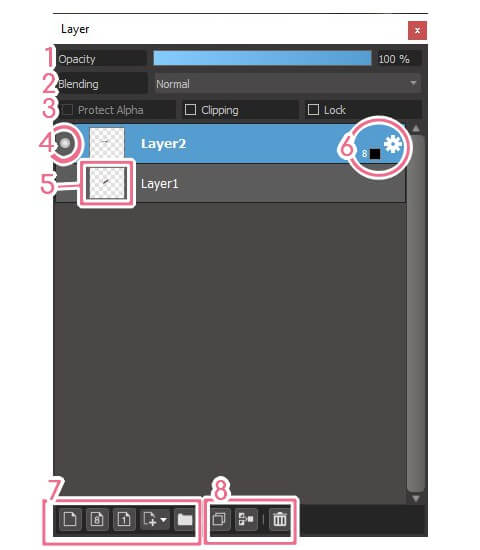
1. Opacity bar:
A layer in a digital art application is similar to transparent paper. The opacity bar will be set to a number between 0 and 100. When the value approaches 0, the image becomes more transparent. With the opacity set to 100, your image will be fully opaque, allowing the layer beneath it to stay hidden.
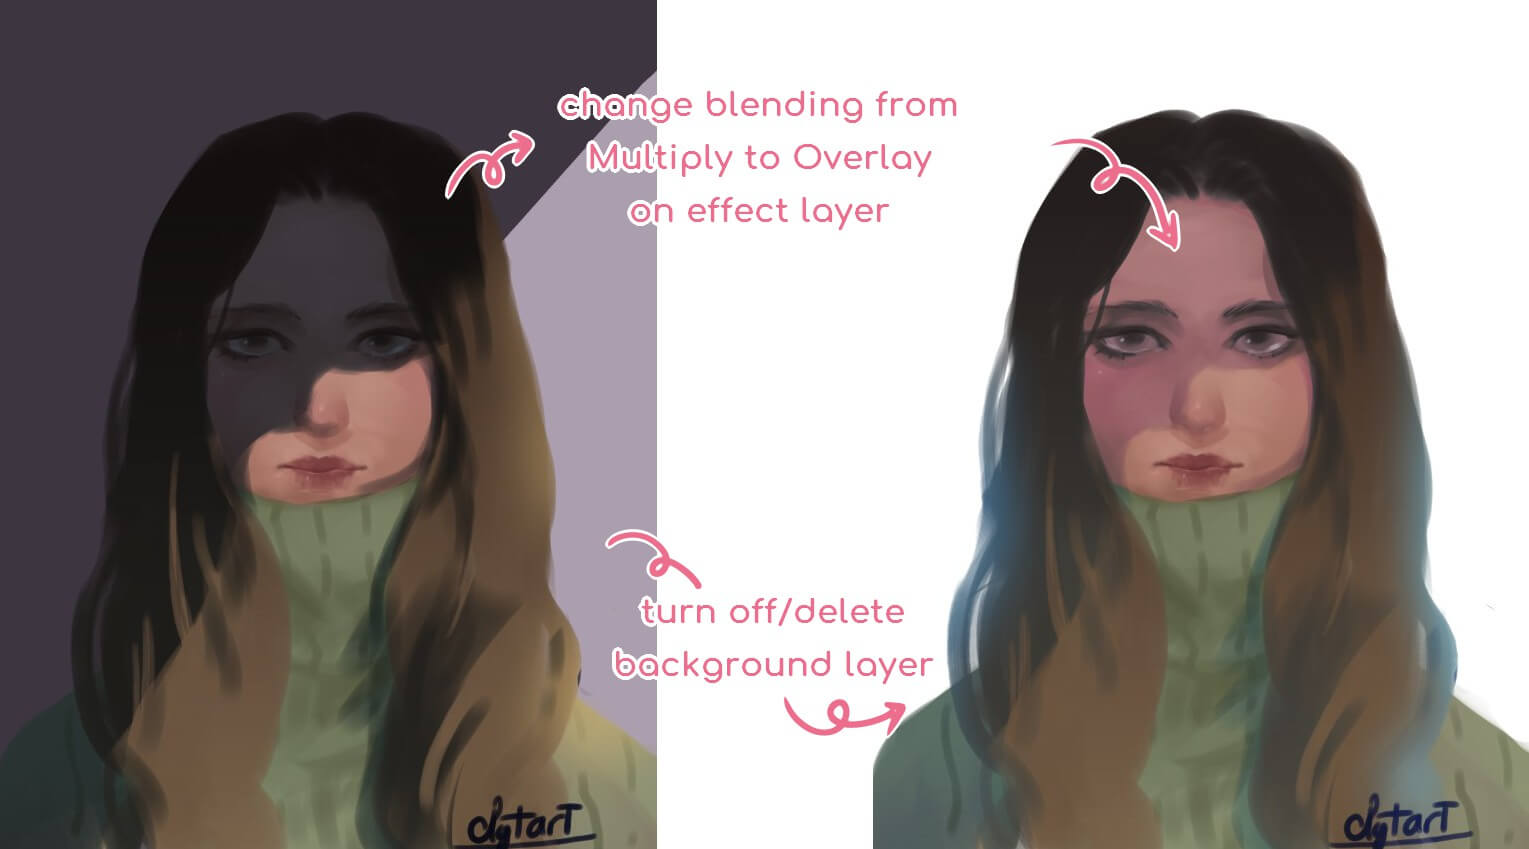
2. Blending mode allows you to create some magic by transforming a regular layer into an effect layer in a flash. Those modes you use in Blending mode will produce a different result or nothing at all, depending on the color you add to your artwork.
Because it's a bit complicated, I'll go into further detail in this post.
3. Layer status
a. Protect alpha
When you select this status for a layer, all transparency is locked. That also means you can't draw anything outside of your previously created field.
This status is handy when you want a neat painting that does not cover another part of the artwork/another layer.
b. Clipping
Clipping, like Protect Alpha, allows you to continue drawing within the area you've created. Clipping, on the other hand, requires a base layer to function. A new layer must be created and clipped to the base layer. This feature will generate a large number of layers, increasing the size of your file. It is, however, extremely useful when you want to change your mind or fix something without affecting your base layer.
c. Lock
When a layer has the Lock button selected, you will be unable to draw on it. We typically use this feature to avoid making unintended changes.
4. The layer eye
This white circle will let you know if this layer is visible or not. Whenever you want to show the final artwork without deleting the sketch layer, you can just click on this white circle to make your sketch becomes invisible. And if you discover a missing layer, you can see if it has this circle turned on or off.
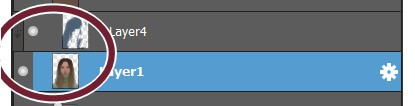
5. Thumbnail
The thumbnail will show the content you create in each layer. It is small but may help you to know which layer you are looking for.
6. Settings
The Layer settings box will appear whenever you click on the gear button at the end of each layer. If you have a 1bit or 8bit layer, it will also show next to the gear.
7. Create layer button
You can create a new layer by using the menu Layer -> Add (choose the line for the right type of layer you want). Or simply use one of those buttons depending on your need: Color layer | 8-bit layer | 1-bit layer | Halftone layer | Folder.
8. Duplicate, Merge and Delete
The following are some quick layer function buttons: Duplicate | Merge | Delete.
The duplicate button allows you to duplicate the layer you've chosen. In contrast, the Merge button will assist you in combining your selected layer with the one below.
You will also find a trash bin button at the bottom to delete any unwanted layers.</ol></ol>
III. Understanding Medibang Layer type
To begin, you must first understand that Medibang has six different sorts of layers: 1bit, 8bit, Color, Halftone, Stencil, and Mask.
1. Color layer
To build a new layer, you already know where to click the button/select the line from the menu. So, if you want to make a colorful art piece, you'll want to use the Color layer.
If you wish to make a Manga/Comics, you can look at the options listed below.
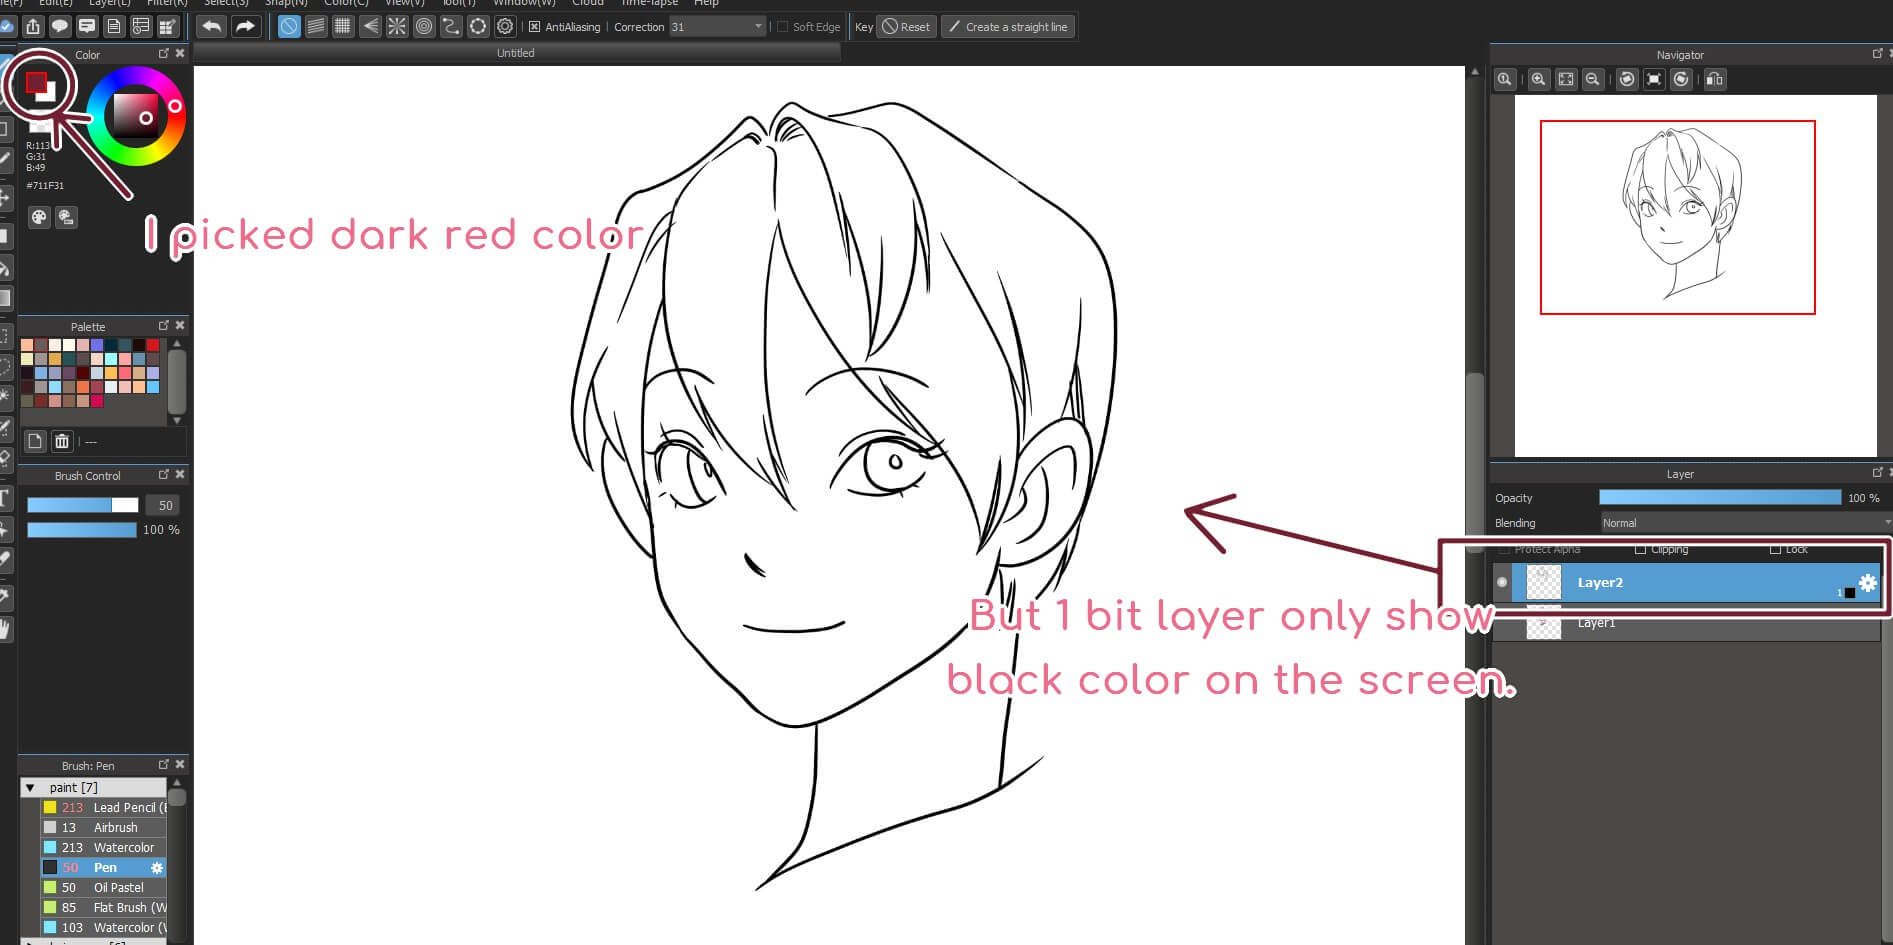
2. 1-bit layer
In digital art, we have pixel displays on computers. Only black and white will be displayed in 1bit pixel art. That implies each pixel on your screen can only display one of two colors: black or white.
We now have a 1bit layer, which we assumed would be black and white. However, the layer in Medibang behaves similarly to a transparent sheet of paper. As a result, the white color will be considered invisible. To summarize, the 1bit layer in Medibang can only display black color.
Why did Medibang create this kind of layer? Medibang Paint Pro is a lightweight digital art program. They explained that the color layer might cause your computer to slow down when dealing with a larger file (grayscale Manga/Comics, for example, may need 600dpi for resolution). Or, to put it another way, Medibang provides 1-bit and even 8-bit layers to help you reduce file size.
If you modify the setting of a 1-bit layer, the color will change. Because of this feature, the 1-bit layer will be the best option for the outlining stage. It will allow you to change the outline color quickly.
3. 8-bit layer
And the 8-bit layer? It can only show black color, much like a 1-bit layer. It can, however, affect the amount of paint you put in your brush.
When you try to modify the ring position on the Color box (which also means you're changing Saturation and Value), you could notice that the color doesn't stay black and instead shifts to gray. However, if you add a background color layer underneath it, you'll see that the gray color isn't as gray as it should be. If this 8-bit layer becomes lighter, it appears to have some transparency. As an example, consider the image below.
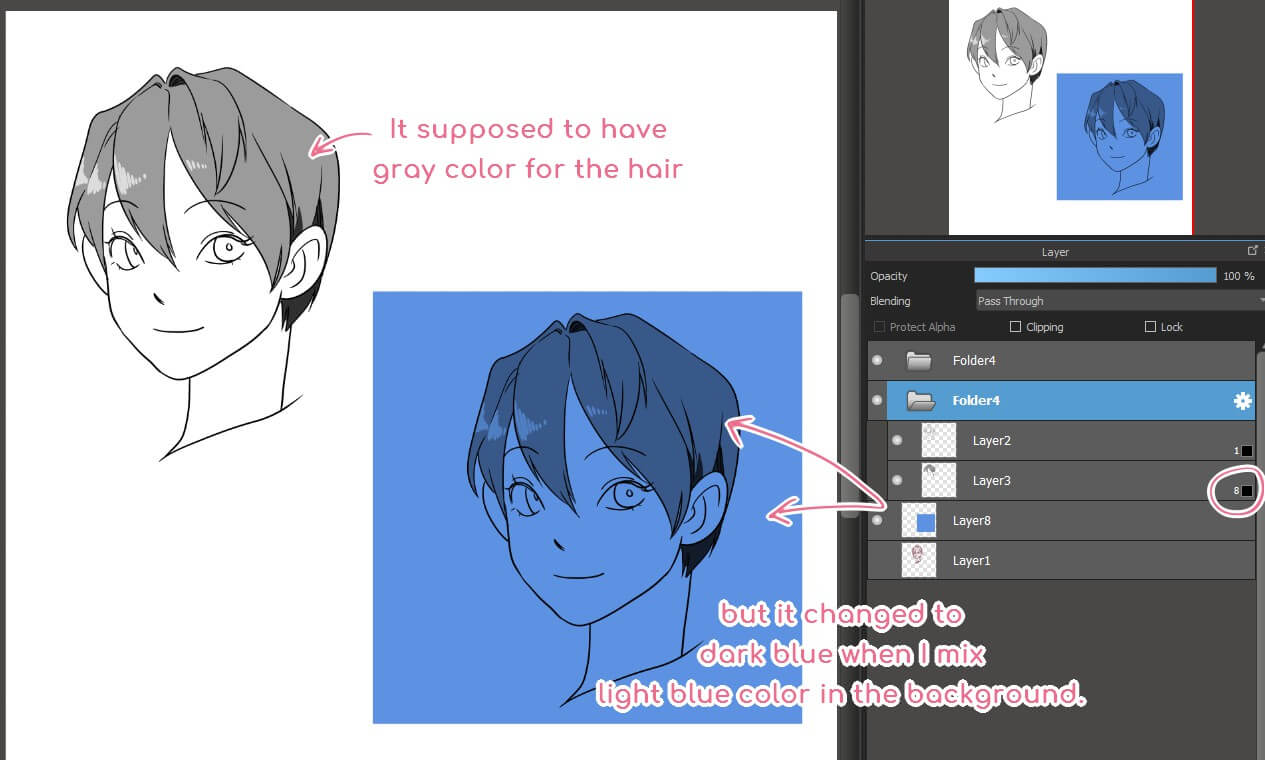
"Why can I only paint gray color even when I choose red in the Color box?" was the most common question I received after posting the instructional on YouTube. The answer is that you chose the incorrect layer.
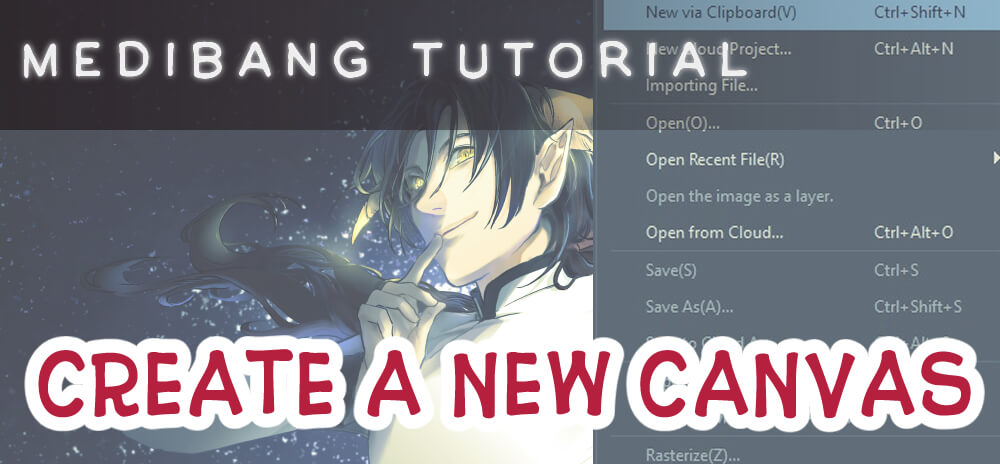
"But I still haven't created a layer?" you'll say. Hmmm, you should check the box Initial layer when preparing your canvas with Medibang. If you're not sure what this is, please see the article Create a new canvas with Medibang
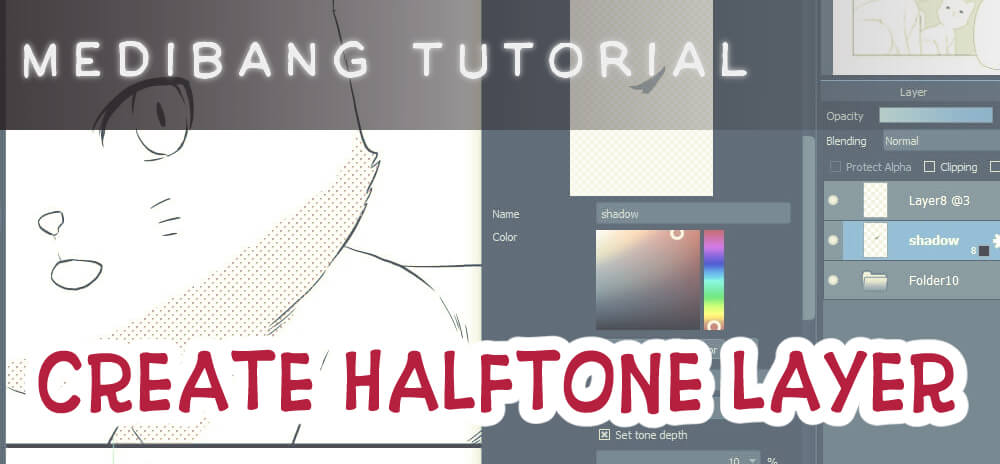
Because half-tone, mask, and stencil layers are somewhat complicated, I intend to write a separate article about them. So, in the next post, let's talk about how those layers work!