Die for food, crazy for cats. Depress at night alone.
Die for food, crazy for cats. Depress at night alone.
You should understand the settings whenever you create something in Medibang Paint Pro or other art programs. You can control a tool to make everything go as you wish when you know about settings.
And it is the same for Create New Canvas function, which I talked about in the previous post. We will explore its settings today.
Go back to the Create New Image window, and you can see we will have 2 tabs: Standard and Comic.
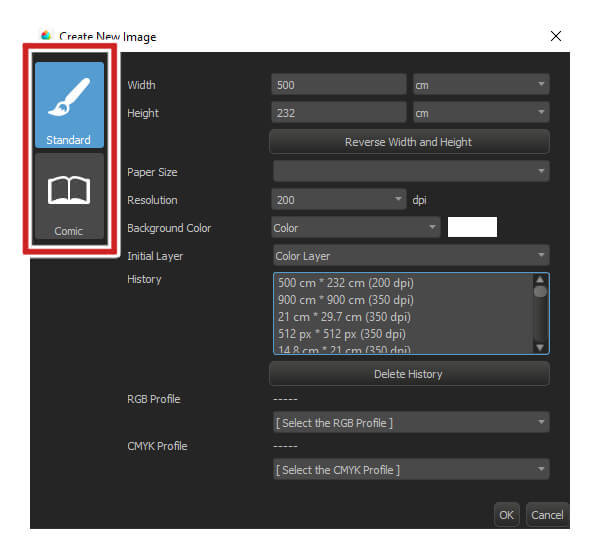
I. Standard tab in Medibang Paint Pro
Pick this tab if you want to do an illustration.
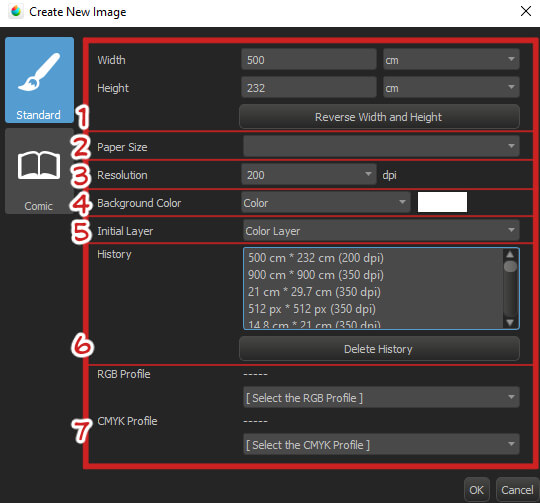
1. Width and Height
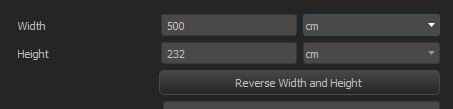
Choose the right size for your paper. You can input the size you want in the box number.
On the next box, click the ▼ button to drop down the unit menu. You can change the unit to cm, px (pixels), inch.
Right below is the button Reverse Width and Height. Click this button to switch the width and Height paper size quickly.
2. Paper size
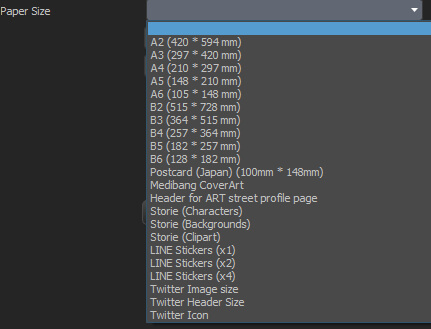
This box will help you determine your paper size. It will show the template with an international dimension. Drop down the menu and choose the size you want. I always use International A4 paper size since I usually print my artwork with this paper size.
3. Resolution

For digital art, the resolution is essential because it will affect the image quality, especially for printing. But the higher resolution will make the file bigger and heavier. You should consider the quality of the image, your purpose (printing or not), and your computer (if they can't handle the big size file, you must find another solution, or else the program/artwork may be crashed).
Usually, I will choose the resolution 300dpi for printing. But Medibang suggests 350dpi for color illustration and 600dpi printing if you decide on grayscale Manga/Comics. You can input the number for resolution manually or use the drop-down menu.
You can change the resolution later, but the image may not be at its best quality. I recommend you should choose the correct value from the beginning. You can input the value from 1 to 2400dpi.
4. Background Color
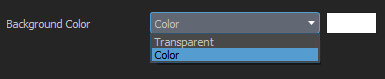
You can choose Transparent or Color background display when you create the file. Let's leave the Color background as the default. It will be easier for you to see your painting process.
You can also change the background color by clicking the white box next to the drop-down menu.
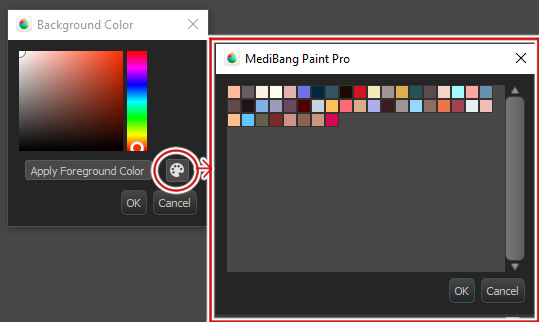
The Background Color box will appear. You can choose the color you want. If you apply the color you picked already in the Foreground color box, click Apply Foreground Color button in the Background color box. You can also open the Palette by checking the button next to the Apply Foreground Color button and choosing the color you already saved!
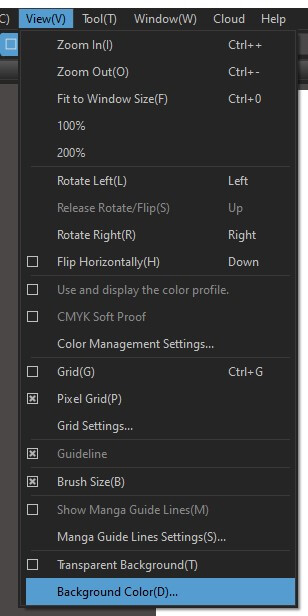
This color background won't affect your drawing if you want to save the transparent background for later. But as you normally save (.jpg type), the background color will be there in the final result. However, You can change the background color later with View -> Background Color
5. Initial Layer

Drop down the menu and choose the 8bit layer as the first layer if you want to draw a grayscale Illustration/Manga/Comics. The color will be the best choice if you want to have colorful artwork.
6. History
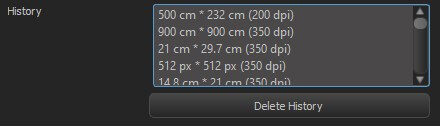
This box will show all the sizes you used before when creating a file. You can choose the size you made yesterday or a month ago and use it again. You can also select the size you don't need anymore, then click the Delete History button, never to see it again.
7. RGB/CMYK Profile
RGB/CMYK Profile is a complex box! You will know: RGB Profile will be the color shown on the computer screen/monitor; CMYK will be the color used for printing. This box will help you change the color settings in Medibang that fit your computer display in the RGB profile. You may need the CMYK profiles that your print shop uses when you want to create artwork for printing. Then you can convert to the right CMYK profile for Medibang, which will later help you paint the correct color.
Color Management is a complex step. But it will help you choose the right color and look the same for your computer screen and the printed artwork.
II. Manga/Comics tab in Medibang Paint Pro
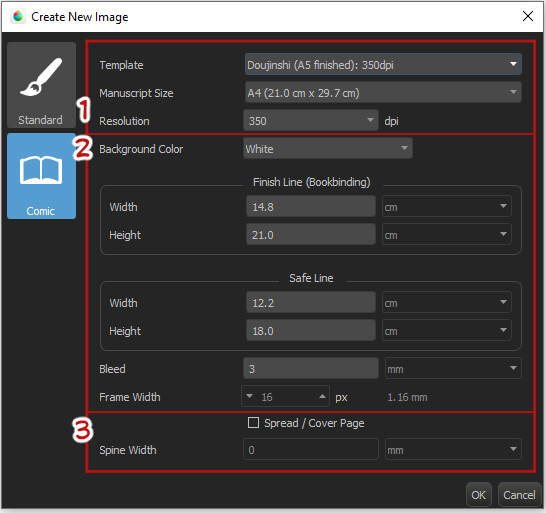
This tab will use for Manga/Comics. That’s why you will have the templates ready for the paper size and printing.
1. Choose the paper size
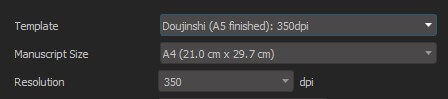
For the Template box, you will select the printing size and resolution depending on the book type. The Manuscript Size will be the original paper size only. You can change the resolution for both of them later, but I do not highly recommend this.
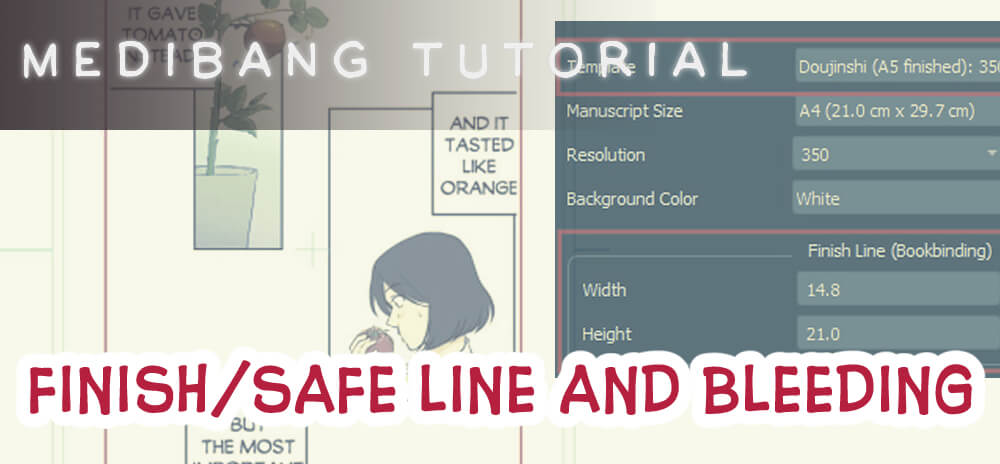
If you want to set the custom size for your paper, you will choose the blank row for the Template box and Do not add a margin outside of the bleed line in the Manuscript Size box. Then custom the size of your paper with this formula: Paper size = Finish Line + Bleed*2
Example: The Width of the Finish Line is 22 cm. Bleed is 3 mm = 0.3 cm. Your paper size = 22 + 0.3*2 = 22.6 cm for the Width.
About the Finish Line, Safe Line, and Bleed meaning, I will talk in the next post.
You can’t change the Frame Width in this window, but you can change it later with the option of the Divide tool. We will talk about this in Create Manga/Comics Frame article later.
2. Background Color
For this Manga/Comics tab, Medibang will let you choose the Background color White or Transparent only. If you want another background color, you must paint it yourself later.
3. Spread/Cover Page

If you want to draw a spread(double) page or a cover page, tick the box to start the file as you wish. Change the Spine Width to the right size for the cover page
Example: Your book will be 3 mm thick. You will input the value "3" into the Spine Width box.
And that's all. Click OK, and you are ready for a paper for drawing.