Die for food, crazy for cats. Depress at night alone.
Die for food, crazy for cats. Depress at night alone.
After reading my previous post about layers in Medibang Paint Pro, you might have an idea of how those layers work. In today's post, we will talk about the different modes of blending available in Medibang Paint Pro.
I. What is the blending mode in Medibang?
The blending mode is the digital magic that you can add to a layer. That magic layer will cause an effect when it combines with the layer below.
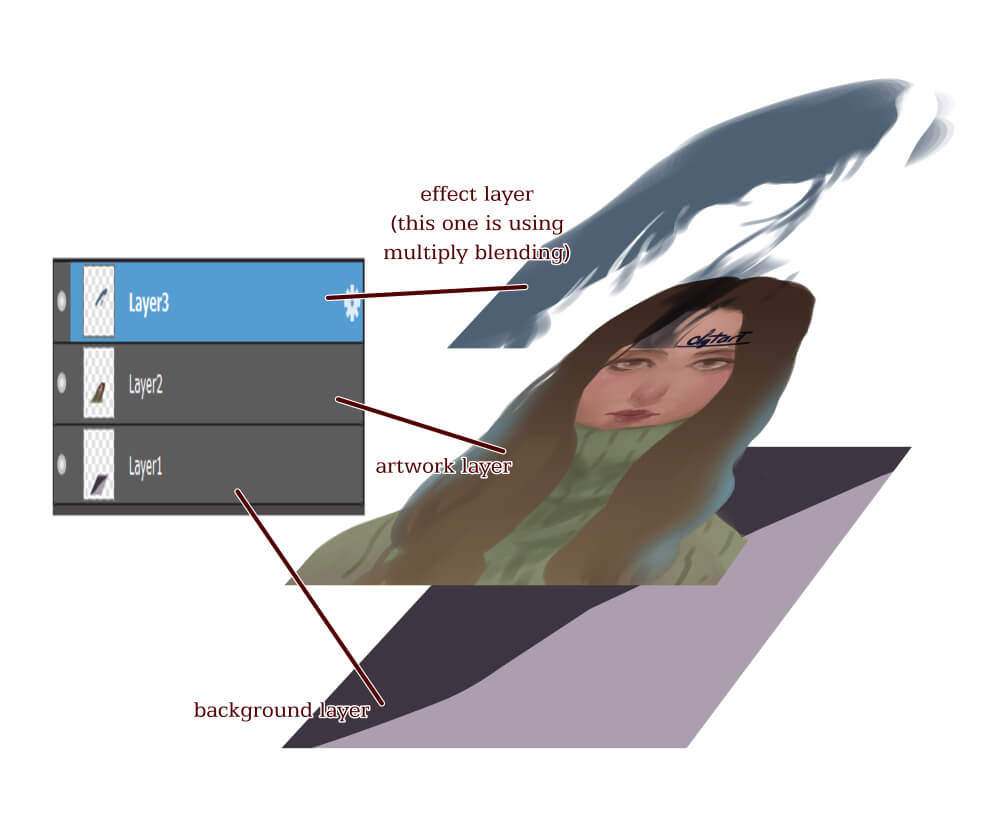
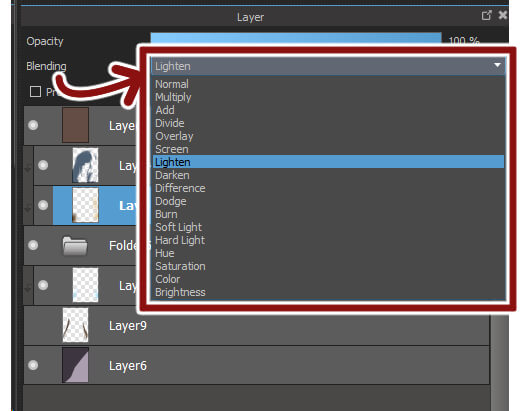
In Medibang Paint Pro, there are 16 blending modes (excluding Normal, which is the default mode), allowing you to create 16 different effects quickly.
II. The first 7 blending modes in Medibang Paint Pro.
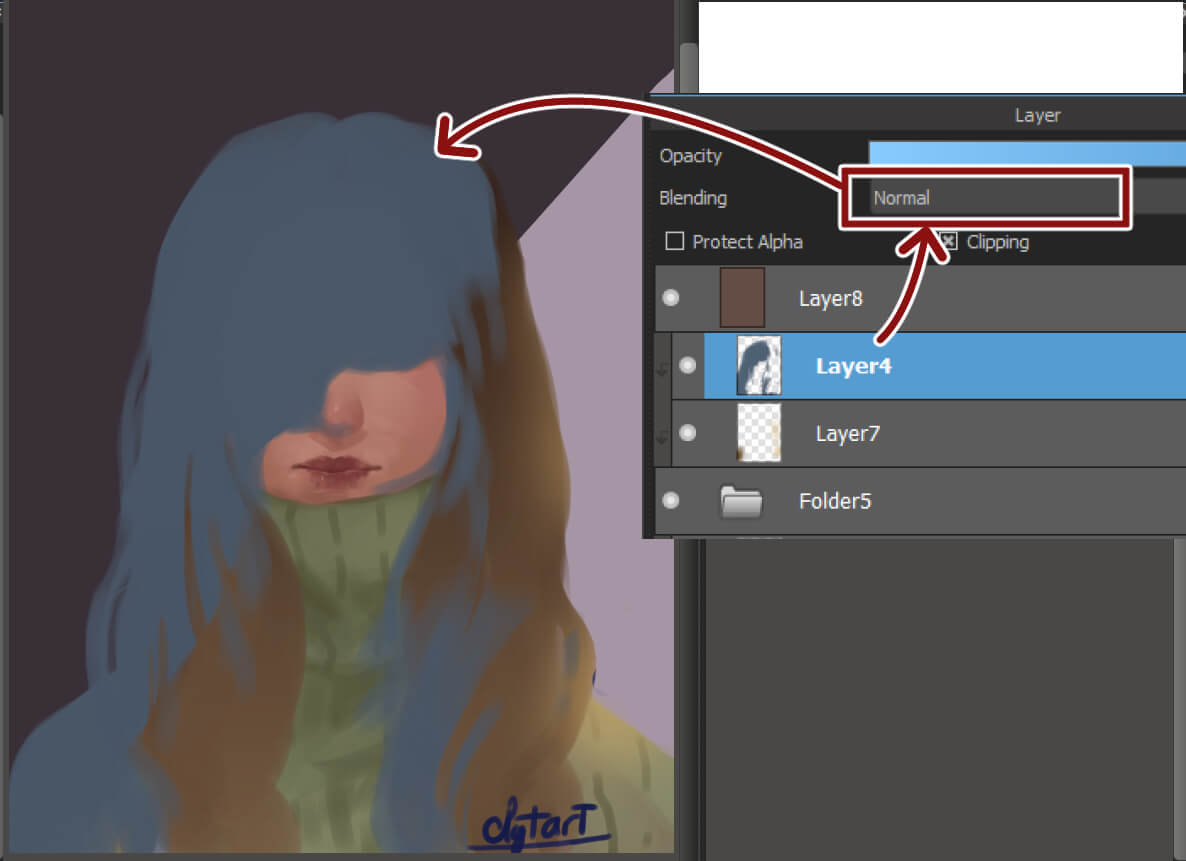
1. Normal
This is the default blending mode. Normal mode is usually used to ensure that the layer above will cover the layer below.
2. Multiply
The most used blending mode, especially when you are a color comic artist. This mode will mix with the base color, making the base color darker. I often use this mode for creating shadows.

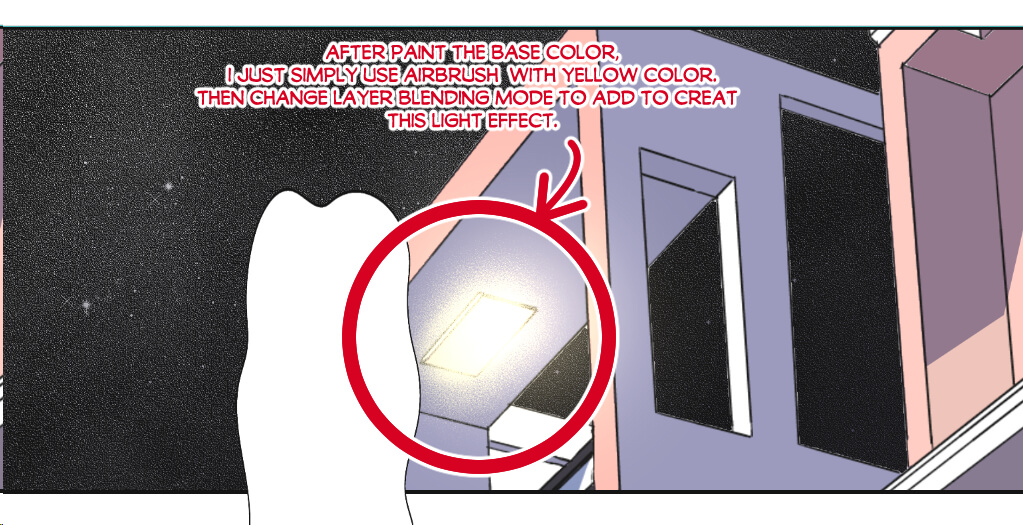
3. Add
This mode will help make your paintings look brighter.
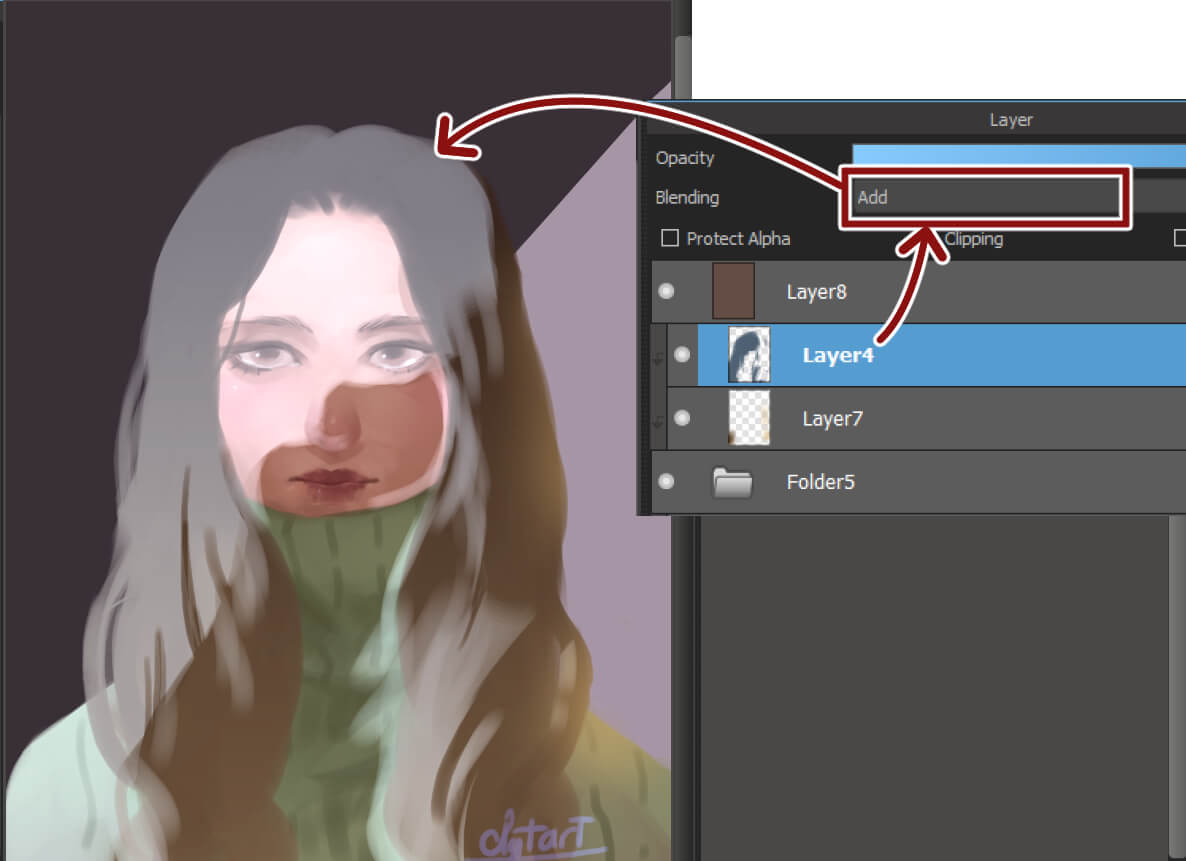
You could use the Add mode with the Airbrush to make something shine. I will have a detailed tutorial about creating shining effect with Medibang Paint Pro later.
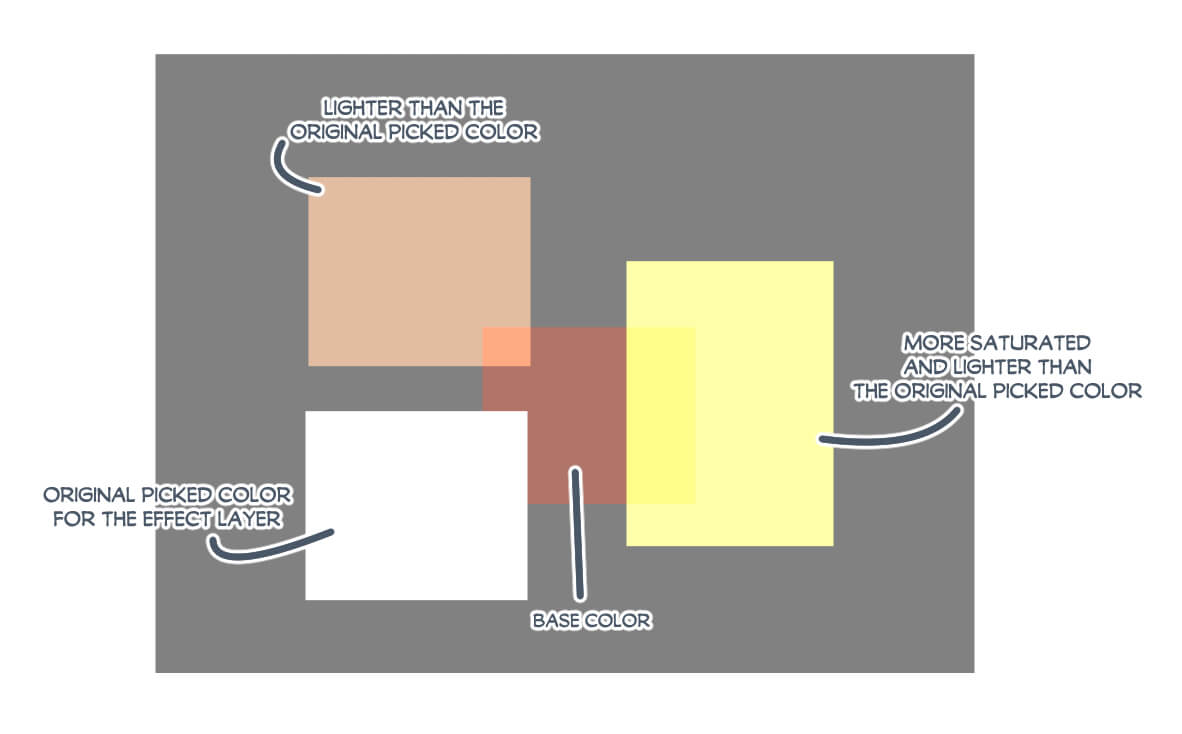
4. Divide
This is a rather interesting mode. Using this mode will make your base color look lighter when you use a darker color in the effect layer.

When you use black, the result will be white. If you use gray as the base color, the final image is the opposite color on the color wheel with a lighter value than the Divide mode color.
In this simple test, we can also see the interesting changing result based on the saturation and value of the color you choose for the effect layer. I will use one base color and one effect color. Then I will change the value (making it lighter) and increase the saturation of that color. This is the test I show in Normal Mode.
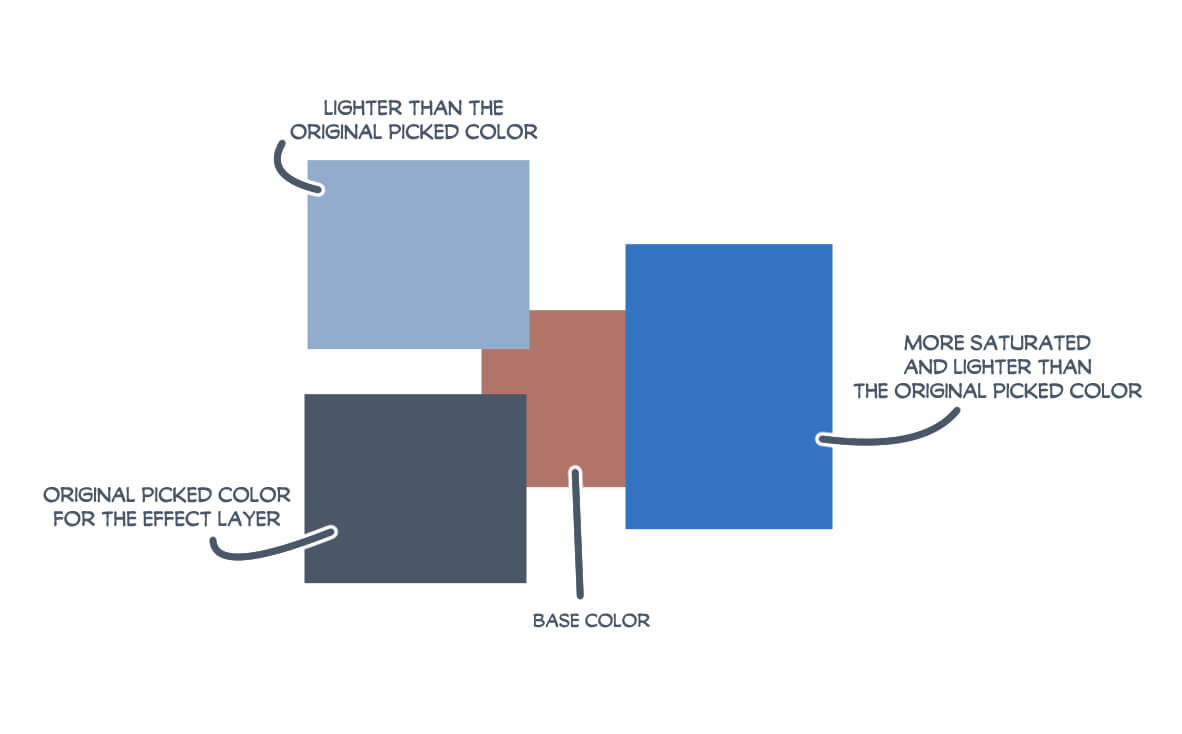
Then we will change the effect layer from Normal to Divided in the blending mode. We have this result. I also put the gray in the background so you can see clearly how this Divide mode works.
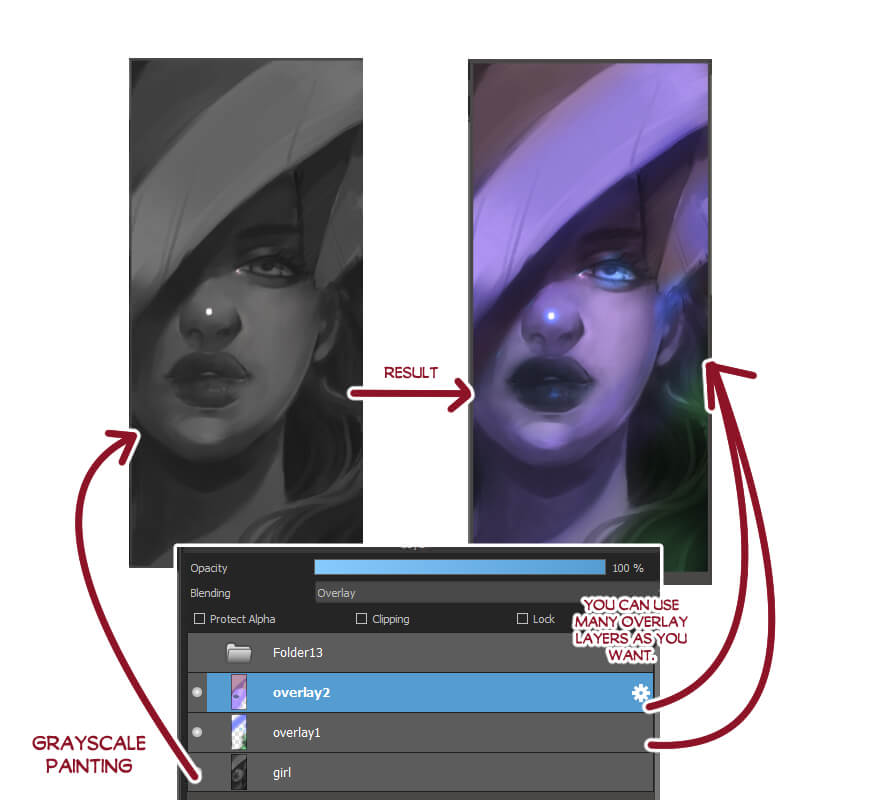
5. Overlay
A mode commonly used by digital artists. Depending on the color value you choose and the color in the layer below, the overlay mode will make the color lighter or darker. Because of that, many artists prefer to use an overlay mode for the color layer they add after completing a grayscale painting.
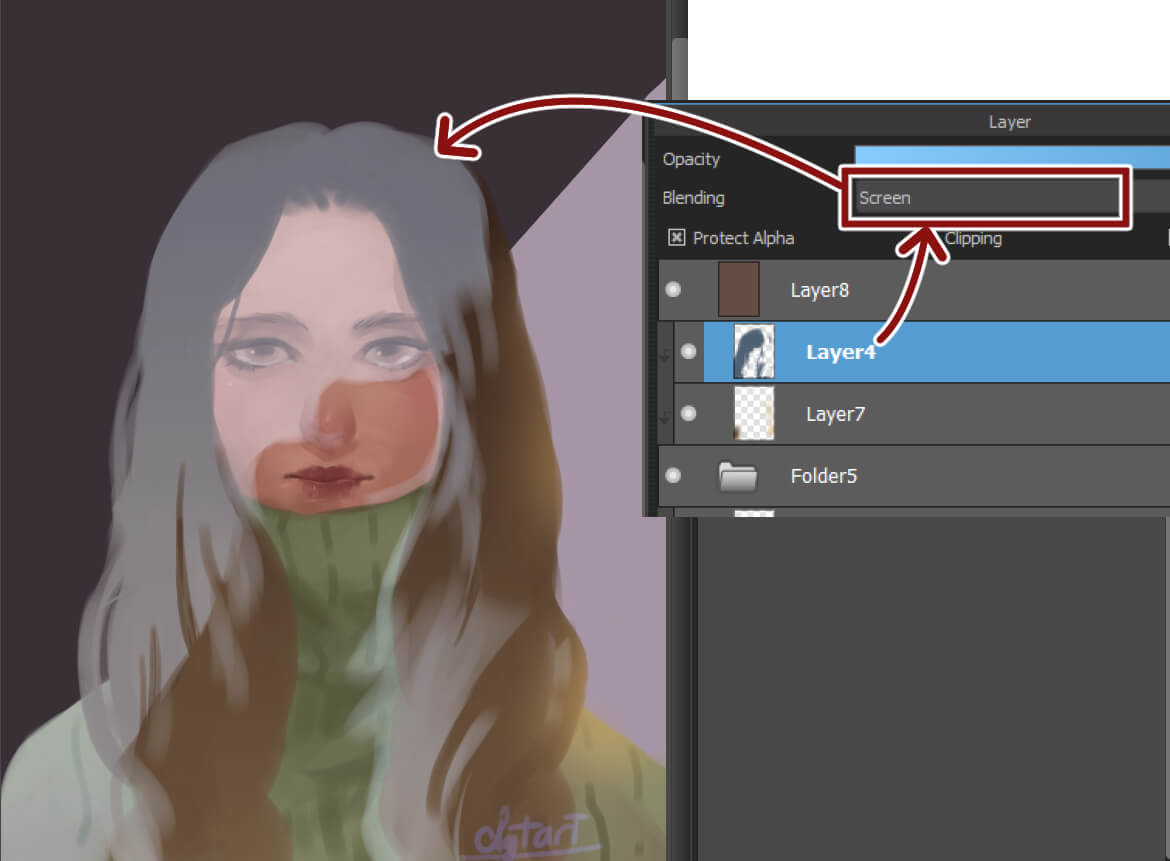
6. Screen
The Screen is the opposite mode of the Multiply. You can use this mode to make your painting look brighter. I often use this mode for flashbacks and happy moments.
7. Lighten
With this mode, the result is always brighter colors. Your painting will remain unchanged if the color of the effect layer is the same or darker than the color of the base layer.
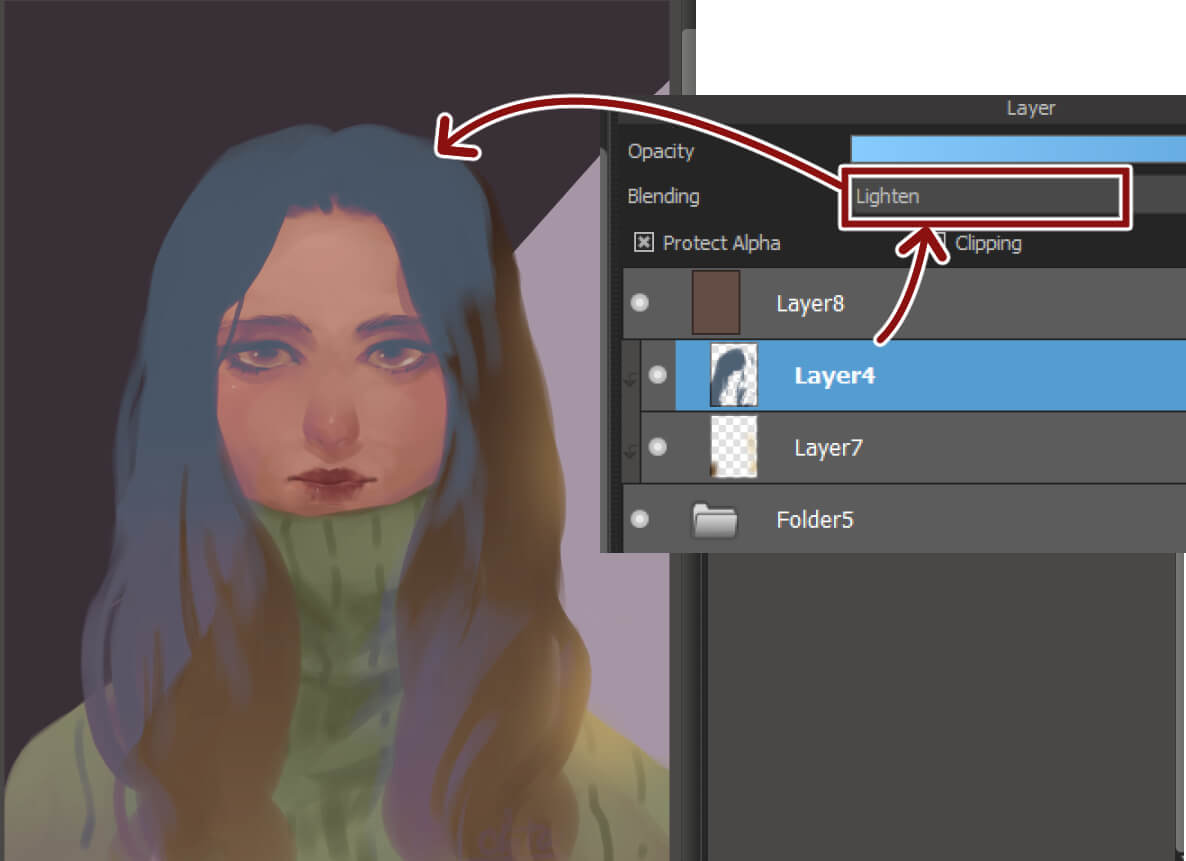
Because of how it works, Lighten mode is often used to add highlights or light effects to webcomic characters.
I hope that by the time you've finished reading this post, you'll have a better understanding of the blending mode in Medibang Paint Pro. The remaining topics will be covered in the following post.